Sunday, May 31, 2015

Seashore Father's Day


Today I have one card that I am entering in three challenges. With Fathers Day right around the corner it gives us crafters time to work on some masculine cards. So, the challenges I playing along with are Color Throwdown, Freshly Made Sketches, and the Mod Squad Challenge Blog.  All these blogs had such great ideas I could have done more cards with each challenge but decided to meld them into one card.

Sending my card off to:
Mod Squad Challenge Blog: Masculine
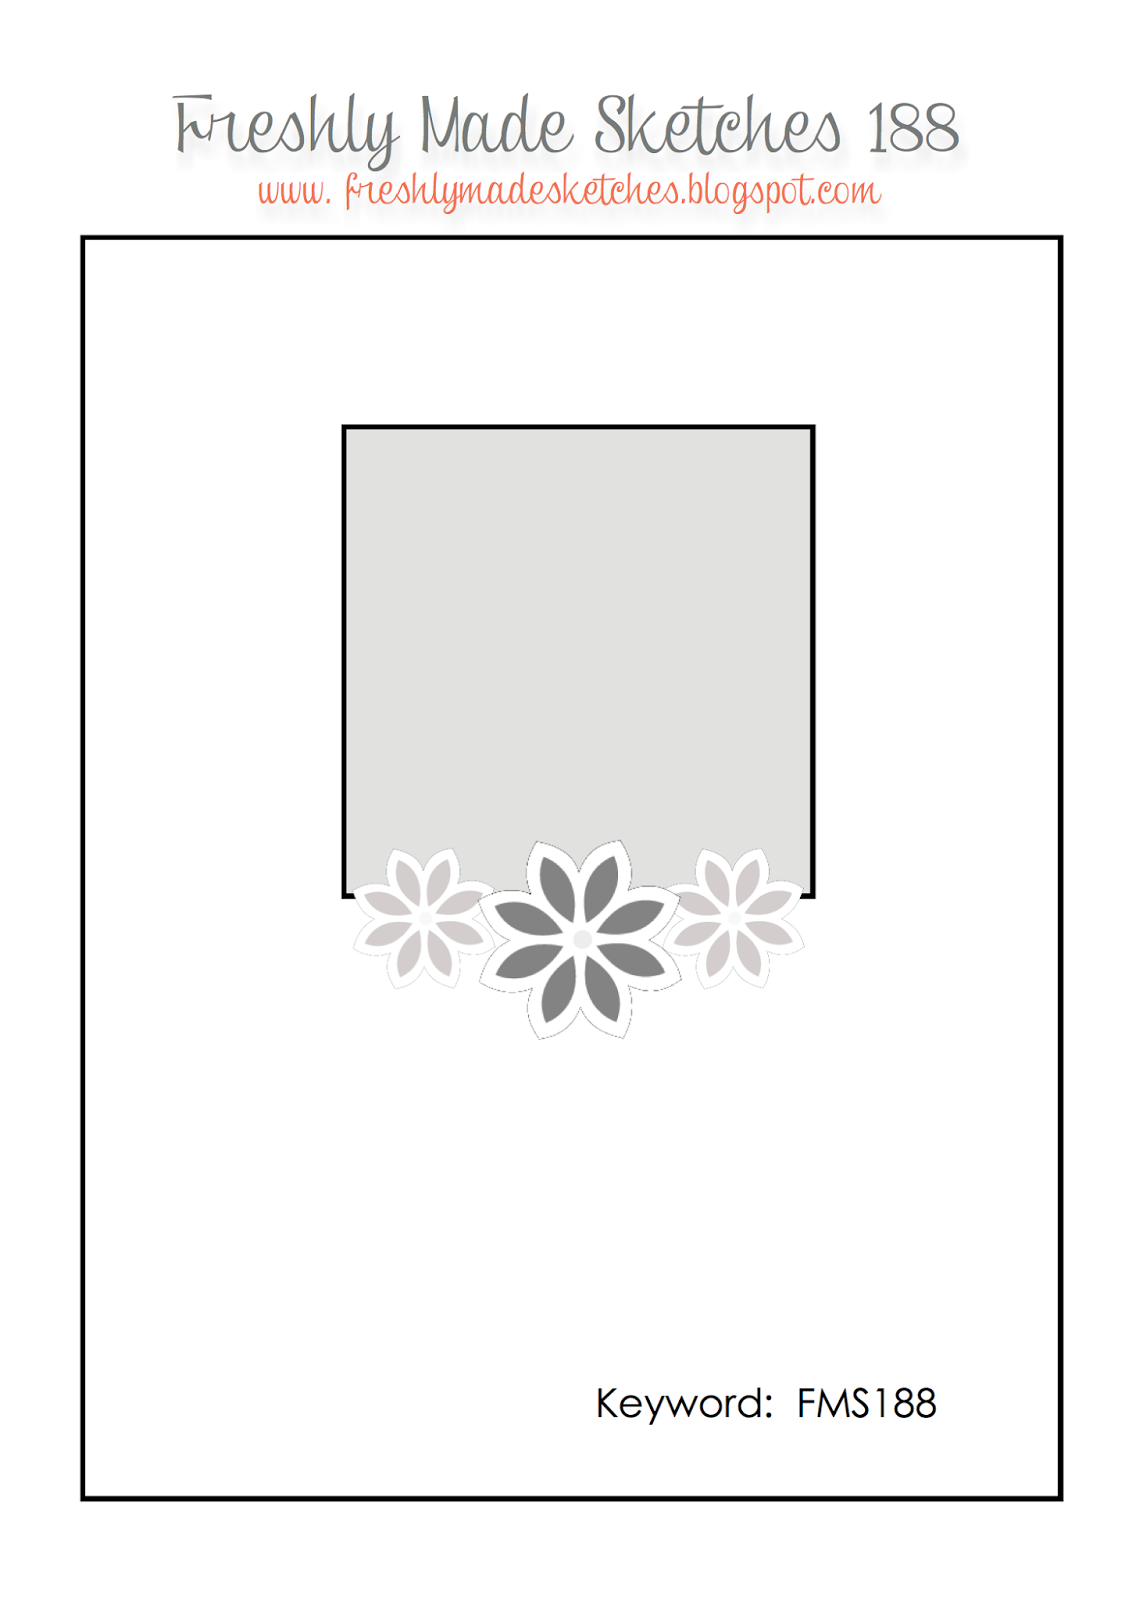
Freshly Made Sketches: FMS188
Color Throwdown: ctd344

Share Our Badge on Your Blog!


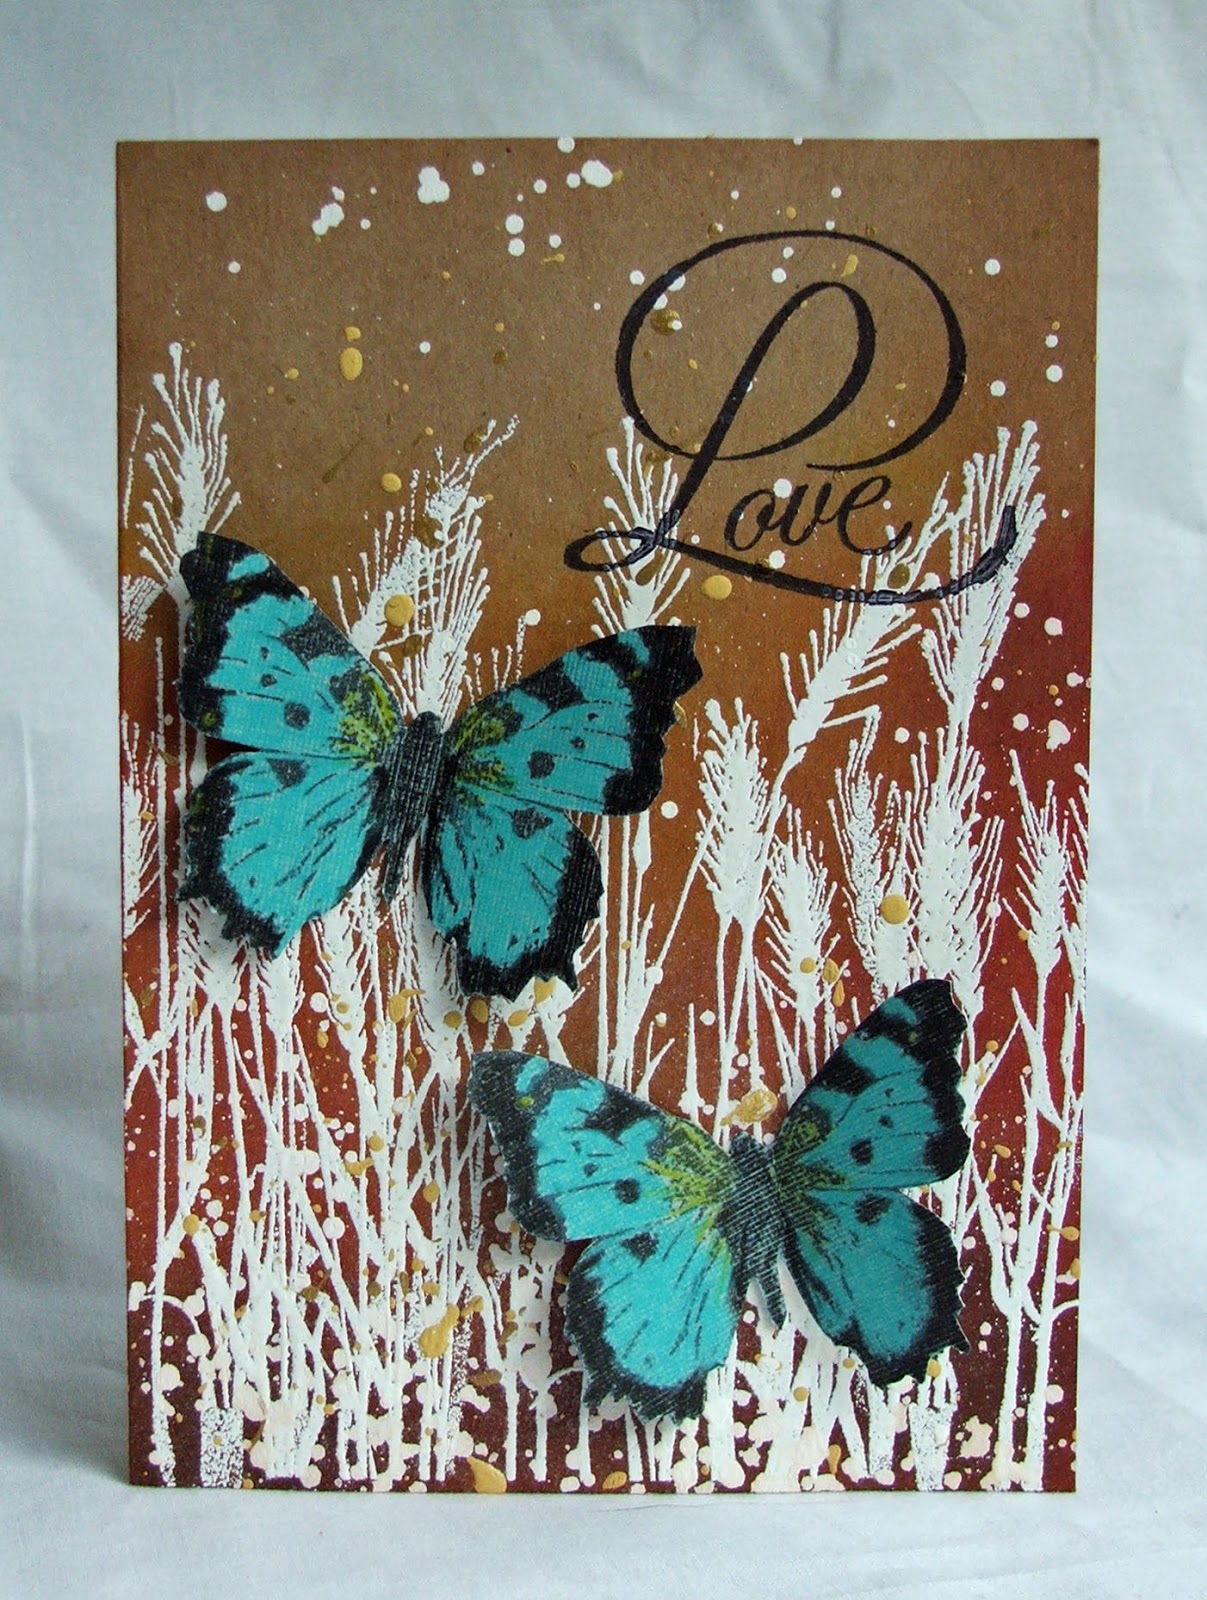
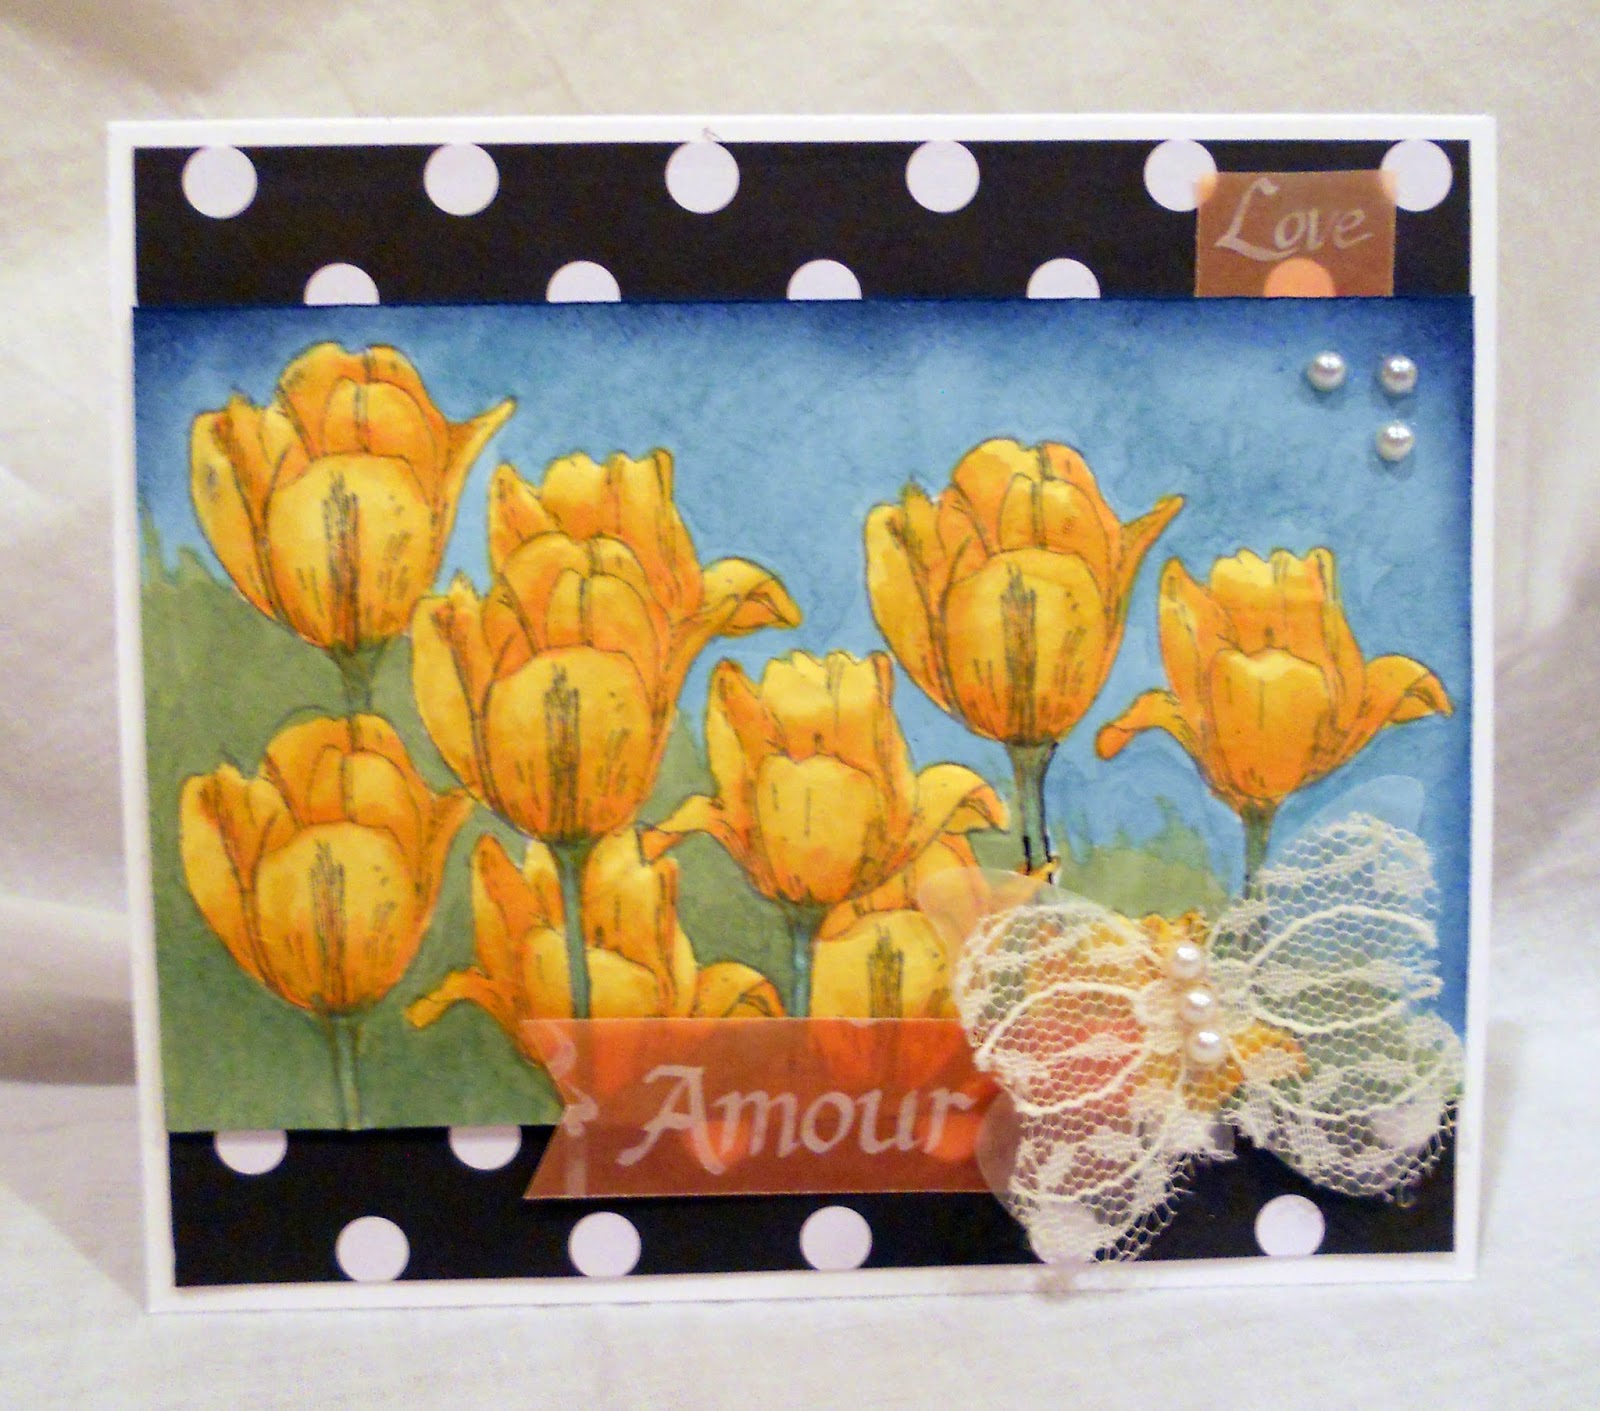
And here is my card! I hope you enjoy it!

The power of three is what Freshly Made Sketches
did for their challenge. I decided to something masculine
and a bit over scaled.
The gray ombre sky gives the card a
more nautical feel vs. blue.
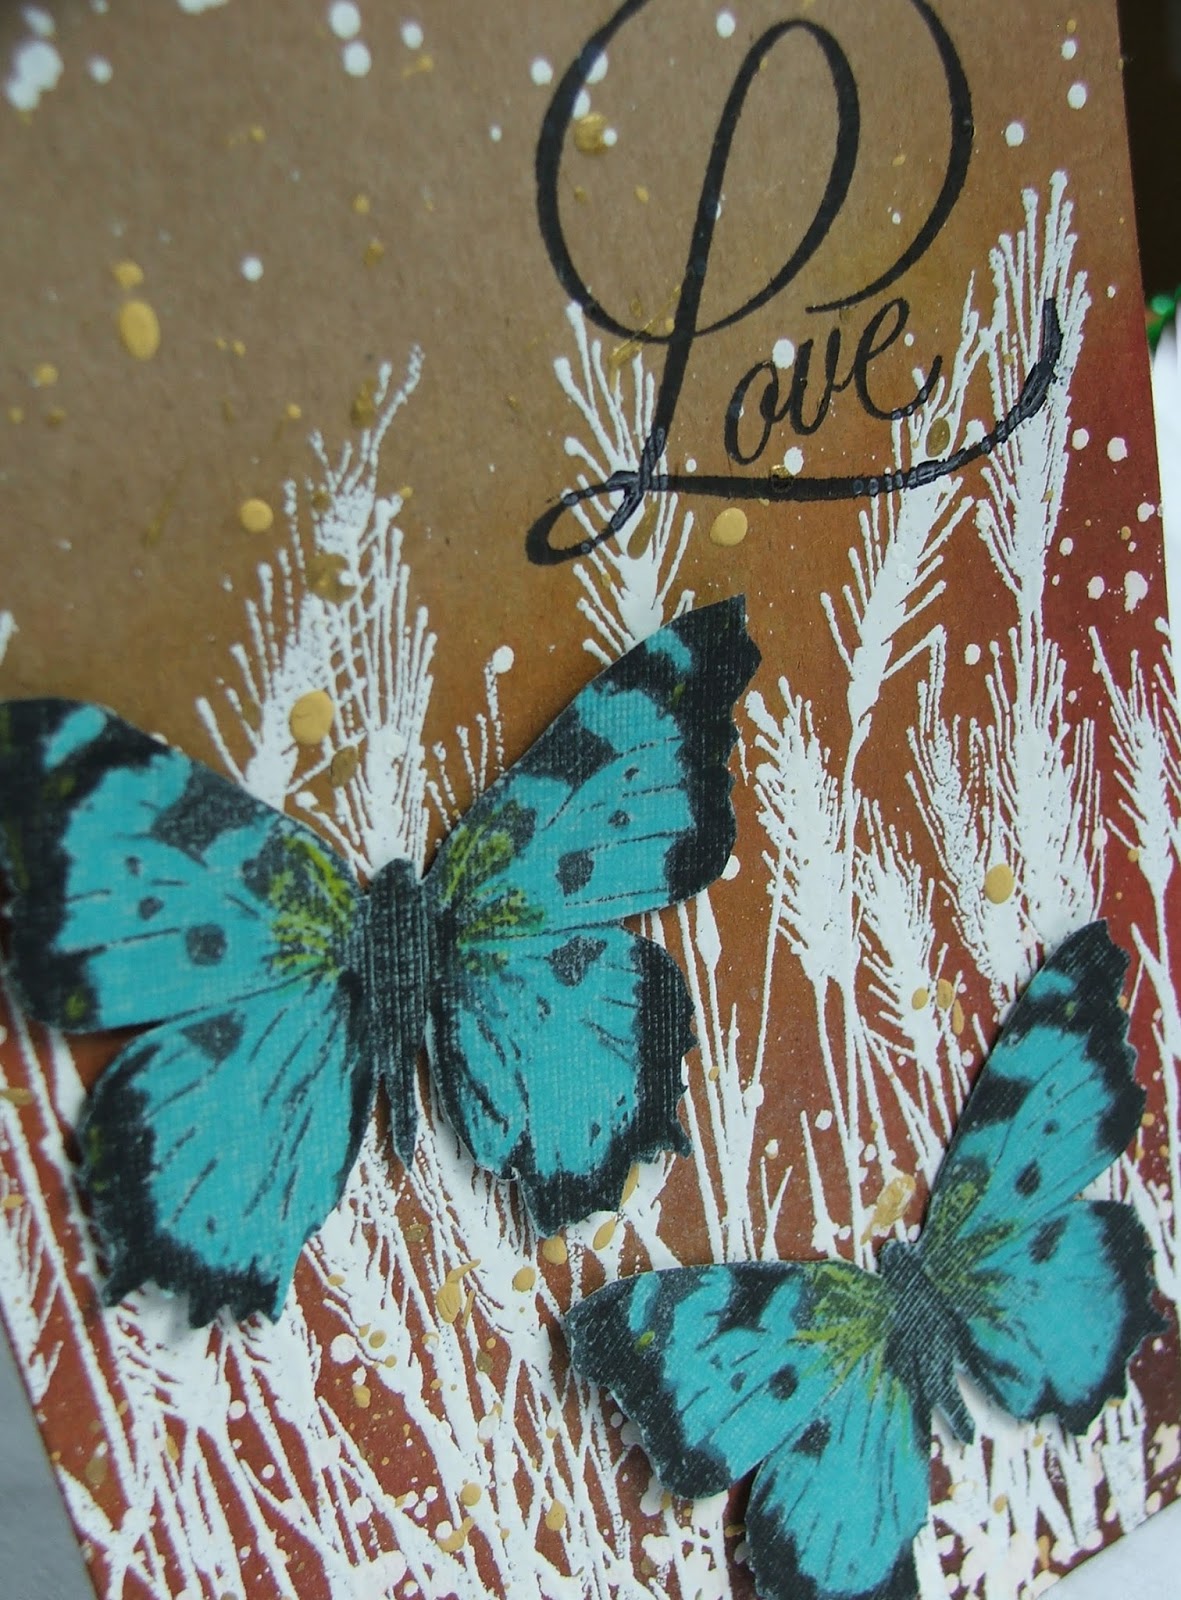
 A close up of my trio being true to the
Color Throwdown color scheme. 
I really like the way this card turned out. The gray ombre is probably my favorite part because it has the feel of a ships dock. The magic of masking allowed all three elements to be on the trimmed layer. Plus the wood texture is also on the same trimmed layer.  At first, the Color Throwdown challenge seemed like it wouldn't work for a masculine card because of the pinkish coral color. However, when I saw this seashell I knew that color was right up this cards alley.

So this is how I did it.

  1. Cut and scored my CS base to A2 size. Set aside..
  2. Trimmed another piece of CS an 1/8" smaller.
  3. Took the trimmed piece of CS and then partial die-cut a rectangle.
  4. Stamped the ship on the trimmed piece of CS. 
  5. Stamped the ship again on Post-It note then fussy cut to create mask. Applied to the card.
  6. Stamped the shell
  7. Repeated step 5 using the shell stamp. Applied to card.
  8. Stamped the plant twice inking up the stamp and thumping on the darker color green.
  9. with all the masks still in place I stamped the wood grain then removed masks.
  10. Sketched around the edges where I will be fussy cutting and then cut around the images.
  11. Colored all the images and wood grain per the Color Throwdown challenge plus some dk neutrals.
  12. Stamped sentiment on dk. brown CS with VersaMark Ink then heat set white. Cut into a strip and added it to the trimmed card.
  13. Traced the outline of the scene on original CS then sponged gray ink to fade out on the top (ombre).
  14. Adhered trimmed CS base to original base.
This card was a bit complicated to make but wow what a result! Like I said at the start of this post all three challenges just worked so perfectly with this design.

Well that is all for me tonight; I hope you enjoyed your stay and we will see you soon. Don't forget to please leave a comment good, great, or otherwise. I like to hear what you have to say!

All the best,
Shawna 

Friday, May 29, 2015

Summer Love

Hello Readers,

Addicted to Stamps says anything goes! Okay, you asked for it! Well not really.. It actually gave me an opportunity to play along with Make My Monday Challenge using a favorite medium, kraft paper!  Also, I see Addicted to Stamps has a DT call and yes I am interested in the position!

GRAB OUR BADGE!
Entering Challenge:
Addicted to StampsChallenge
#146 and DT call
To Find Our Current Challenge
Entering Make My Monday Challenge:
Theme: Use Kraft Card
This card is so pretty and sophisticated with a touch of whimsy! It reminds me of the end of a long summer day. Pollen and butterflies are whisked around with a light wind among the wheat.. Well anyway that was my story when I created it.. Enough of the sentimental stuff here is my card for today.

After heat embossing  the wheat I thought it
needed something more on the bottom.
Just a bit of Distress Ink sponged on the bottom
gave it the depth I wanted.
The butterflies were stamped on blue CS
I lightly highlighted the wings with PrismaColor pencils
and fussy cut the images.
You can see the color variation on the kraft paper.
I really like the way it turned out.  
Well there it is I hope you like what you see! It was so fun to make and I am pleased at how it turned out. It is rich with color but with the dark undertones it maintains a neutral effect.  Those two frolicking butterflies are just beautiful with their touch of yellow and striking blue make the sentiment work so well.

So how did I do it? Here is the way:

  1. Using a packaged kraft card base I stamped the wheat with VersaMark Ink and then heat set with white powder.
  2. Sponged 'Rusty Hinge' on the bottom of the card and worked my up fading the color out on the top.
  3. Sponged 'Vintage Photo' Distress Ink on the bottom.
  4. Mixed white acrylic paint with some water to thin it out then splattered the paint on the card base.
  5. Repeat step 4 but used yellow paint. Let dry
  6. Stamped butterflies on a separate sheet of blue CS then lightly highlighted the wings with some yellow PrismaColor pencils. 
  7. Fussy cut the butterflies.
  8. Attached the butterflies by its body leaving their wings free.
  9. Stamped the sentiment in black.
Well that is it for me! I want to thank you for stopping by and hope to see you again soon. Please don't forget to leave a comment good, great or otherwise. I like to hear your feedback.  Also, thank you Addicted to Stamps for considering me to join your design team.  

Take care all and have a great day!!!

All the best, 
Shawna 


Wednesday, May 27, 2015

Thank you!

Hello all,

As the school year comes to a close it is time to thank all the teachers that have helped my children grow. So when I saw 'the challenge' at Always Playing with Paper I knew I was in.

Entering 'the challenge' #36
'Celebrating Teachers'
Appreciation for our teachers is something I don't do enough. I mean they have to deal with us all. Teaching takes a ton of perseverance, patience, and loads of grace. I know because I volunteer in my children s classroom three days a week in the mornings. There is no way I could do what teachers do. Hats off to them! Here is my entry.

The large sunflower, sentiment, and colored sunflower
make the eye pleasing triangle.
All the elements from this card all work todgether
to form a clean design.
The twine looks like one string but in fact it is two.
I am in L-O-V-E with this card! It almost pains me to give it away! The simplicity of the design is so out of my comfort zone but I had to push my limits and here is the result.

The gigantic sunflower started it all off. As it is very large, the light 'wild hare' color calms it down and draws it back from the larger then life sentiment. A touch of color is all this card needed from the small sunflower. Why? Because the over exaggerated sentiment needs its space to dominate. So much so I stamped some of the 'thank you' off the card. I liked the way it worked.

As for the twine it is actually two pieces of twine made to look like one. The twine wrapped around the card is adhered with a dimensional dot and the bow was tied to a die cut paper button then glued on the flower.which was then put on the dimensional dot.

Well that is all for me tonight. I hope this post finds you well and I hope to see you again.  Don' t forget to leave comments good, great, or otherwise. 
Thank you for stopping by!

All the best,
Shawna 

Monday, May 25, 2015

Peacock Remodel

Hello All,

Just a quick note to say thank you so much to the design team at (PIN)spirational for choosing my card for their Top 3!! I am so thankful and pleased you liked it..

For today I am sending my card to Color Throwdown.  What a fun and cheery color combination.  The cool colors work so well with the mustard yellow.

Sending this card to
Color Throwdown #ctd343

The minute I saw this challenge I knew what I was going do but naturally it didn't turn out that way.. What I ended up doing was disassembling a card I did awhile ago and reworked the entire card with these colors in mind. I think it ended up better then the original! At the end of this post I will show you both and you tell me what you think. Well enough chit-chat here is my design hope you like it!!


As you can probably surmise my computer decided to have a tantrum today and wasn't working for a few hours.. So I had to upload my images to Pinterest then attach the file to this blog.. The photo quality was terrible but that is all I had... Decided to give it one more whirl and here we are.. What a serious pain!! New computer coming soon...

So anyway this is my card for today. Like I mentioned earlier the peacock image was done quite a long time ago.. I kept the design essentially the same from the original but changed up the sentiment and the colors indicated by the challenge.
  1. I had the Lost Lagoon card made from a previous project to an A2 size.
  2. Punched a border on shimmery purple paper attached it to the card.
  3. Added yellow border to the left.
  4. The peacock panel was done using the opposite side of the border paper cut to size.
  5. Used previous ribbon from the last design attached it to the purple panel.
  6. Added a yellow banner then the peacock image.
  7. Color rhinestones to match the purple and added it to the peacock for some sparkle.
  8. Die cut the label and stamped sentiment attached to card.
That was it... If the computer cooperates I will post the original pic I did two years ago... Here we go.. If I do shut down thank you for visiting and we will see you soon and of course comments of all kinds are welcomed. 

I made this card about 2 years ago and just kept it.
I thought it would be perfect to rework it for the Color Throwdown Challenge.
Phew! I made it!! Have a great night everyone.. And for those in the U.S.A. I hope you had a very special Memorial Day. Take care all and see you soon (I hope)...

All the best,
Shawna


Sunday, May 24, 2015

Pearly Butterfly

Hello again,

This is my second post of the day.  For this post I am sending my card to Freshly Made Sketches and (PIN)spirational Challenge. These two challenges made for the perfect storm of creation!

Entering Challenges:
Freshly Made Sketches #187 (FMS187)
(PIN)spirational Challenge #140

  https://www.pinterest.com/pin/141581982011934400/

Here is my card! I really hope you like it.. Here we go!!

I took the photo inspiration quite literally.
Elements of course changed for the card but the
overall feel is the same as the photo
Banner is weaved in the design for interest
and so I could fit the sentiment.
Pictures never do Perfect Pearls justice.
The light blue shimmers and gleams in the light.
Just beautiful
Photo showing the double embossed leaves,
the texture of the flowers, and
again, that beautiful blue butterfly!
 Well what do you think? The first thing that popped out to me from the photo was the butterfly!! Wow those blues are just spectacular! So for my card I decided to exgraggate it but try to keep the same coloring.

The green backdrop was dry embossed twice. Once inking the folder with white frost ink and then flipping the folder and embossing with no ink.. I like how it turned out. Like the green in the photo this green provides depth for the card.

The flowers were actually die cut from a larger flower I thought would fit but was too big for the design. So I ended cutting it up into little flowers. I like it better because it shows the glitter embossing and coloring of the original flower..

The layout of course came from Freshly Made Sketches which pulled the entire card together.. Great layout and I thank you for the design!!

That is all for me right now.. I am now on my way to a neighborhood cookout with my family.. Fun times!! Thank you so much for stopping by and please don't forget to leave a comment good, great, or otherwise!

See you soon from TheGrandStampede!!

All the Best,
Shawna


Cards & Cotton Balls. What!!

I thought the same thing when I was wandering around on Deb Valder's blog at www.Stampladee.com when I came upon an interesting card. So off I was to Deb's YouTube channel. This is the video I saw that inspired my card.


She uses a manual embosser and cotton balls.  I saw Deb's card and was intrigued at how 3D it looked. So, I had to try this for myself and with the prompt of DRS Designs Color challenge I was on my way!

Entering Challenge:
Inspired by Color #175
When I saw these colors I just fell in love.. What amazing inspiration... Well I hope you like my take on the challenge.. Here is my card.

Card Size: 4" x 6". Using all the colors from the photo
I think this card turned out wonderfully.
The butterfly is actually made using a punch and lace that was given to me by
a friend. The patterned vellum had the perfect sentiment!
It really looks three dimensional and what a 'feely' card
Worked out just like Deb said.
Again showing the embossing using 110 lb. paper,
craft mat, and hand embosser.
I am not going to go through a step-by-step on how I made the card but if you didn't want to see the video here is how I made the embossed image.
  1. Stamped the flowers on 110lb. paper and then colored them using my alcohol markers. 
  2. The markers did bleed through the paper which was a good guide to start tracing my flowers with my embosser.
  3. Again using my embosser and craft mat I embossed and filled in the flowers and stems.
  4. Flipped the card over and traced some of the petals for more dimension.
  5. Glued in some cotton (not much) inside the embossed areas to really make the flowers pop. Let dry.
  6. Adhered it to the polka dotted card stock.
Well that is it for me.. I hope you enjoyed your stay! Thank you so much for stopping by and please feel free to leave a comment good, great, or otherwise. Take care.

All the Best,
Shawna 

Friday, May 22, 2015

May flowers

There is a special place in Michigan... A magical place that is filled with fairies and dreams come true.. Well at least if you are a kid who doesn't pay property taxes, have to keep up the lawn, the house, or take care of a water main. This very special place is called Castle Park, Michigan..

In May Castle Park starts to come alive with vacationers, visitors, family and friends. So when I saw CanYouCaseIt? challenge I thought this would be perfect for the theme May flowers.

CYCI#70
Entering Challenge:  CYCI#70
This is the first time sending my card here and I surly hope you like it... It is a bit risky because it doesn't show all the colorful flowers but the sky was so mystical and magical and the purple silhouettes of the flowers were very fitting. Well here it is I hope you like it...


So can you believe this stamped using celery! I cut the stalk and dipped it in yellow acrylic paint.  It didn't turn out right plus there were flex of other colors in the yellow. So I let it sit.... for a year.. Then I thought I bet ya the acrylic paint would resist watercolor paints.. So I took it out of my storage box, dusted it off and tried it... WOW!! How dreamy!! I just loved the way it turned out. I just kept mixing blue-greens, yellow-greens, dark greens, light greens for what seemed like a few minutes then I checked the clock and in fact I was doing this for an hour and a half.. Completely transfixed!! Then I saw the stamp to go with it and presto!! there it was... Sponged the edges and added the sentiment... But it wasn't done.. It still needed magic.. So I stamped my little fairy and took to the watercolor again! To balance the composition out I added some leaves and watercolored those as well.. I had to split the celery stamped paper in half so maybe in another year you will see another dreamy background..

I hope you enjoyed your stay with me today... Don't forget to leave a comment good, great, or otherwise.. For those of you in the USA happy Memorial Day.. We will never forget our soldiers sacrifice for this country. Thank you.. 

All the best,
Shawna 

Wednesday, May 20, 2015

It's About Time!

Hello All,

First, I would like to thank The Paper Players for acknowledging my card 'Genie in a Bottle' as a 'Cut Above'!! Also, I would like to thank Inkspirational for my card design 'Greetings Earthling' as one of the top 3!! I really do appreciate the accolades.

I have been MIA because I have been so busy. I will spare you the details but just running around not having any time to craft... Ho Hum... There is a bumper sticker I see every now and then that I should really take to heart. Especially now; Too Blessed to Complain... So I will get off my soapbox, put a smile on my blessed face and tell you about the challenges I am going to enter.

The first challenge is from Sunday Stamps. My friend, Monika is a new DT member and I have never seen this blog before her... So far I love it!! Blue is my favorite color so win, win for me!! Also, I am entering The Friday Mashup. The challenge was to mash congratulations to the graduate and use the colors provided. I didn't use the yellow so I guess I am not mashing this week..

Sending this off to these awesome blogs:
Friday Mashup: FM209
Sunday Stamps: SSC101


For some people it seems like they are in school for a really long time. For most students it is for good reason, others well, not so much... So I wanted to play on the graduate theme and poke some fun at it.. I hope you like my card..

The huge sentiment is very fitting with a small
'congratulations'.. It's like saying 'so glad you made it through
but it took a longggg time!'
Using only blues per Sunday Stamps.
Used colors Night of Navy, Bermuda Bay, and London Fog
Tick-Tock time is ticking!! The arrow to point out
the sentiment. 
This card has some dimension with die cut letters, the arrow, and banners.
Clocks were also popped up with dimensional tape. 
Okay well I thought it was funny... Anyway, this is how I did it.

  1. Stamped the clock background using London Fog ink.
  2. Stamped the blue grungy background over the clock background.
  3. Colored the edges using Stampabilities Bermuda Bay and Night of Navy markers. Cut to size.
  4. Sponged the edges for a more distressed look. 
  5. On a separate piece of CS I stamped the clocks again coloring a few and then cutting them out. 
  6. Stamped the big clock using London Fog ink. Die cut.
  7. Stamped the 'congratulations' using VersaMark Ink then heat embossed it white. Die cut the banner.
  8. Die cut the letters containing the sentiment and the arrow.
  9. Colored white CS Bermuda Bay then die cut into banners.
  10. Arranged all the elements on the card and adhered that to the white CS base.
Well that is it for me... I hope you have a wonderful day... Any comments good, great, or otherwise are welcomed.  If you take issue with this card please don't but if you want to voice your opinion that is just fine too! Take care all and we will see you soon!

All the best,
Shawna  

SU Sense of Time (retired)


Friday, May 15, 2015

Celebrate Vintage!


Hello All,

For today I am sending this card to Runway Inspired Challenge..  I actually had a dress like this one in high school.. Goodness knows what happened to it but I remember it like it was yesterday..

Entering Challenge:
Runway Inspired Challenge: ric#83

This dress reminds me of a dress I owned in high school.. It was so very comfortable to wear.. However, I think this model holds it very well.. And of course I saw this the day it posted so why not wait till the last minute!! Anyway, I just couldn't pass this up!! Here it is!!

Celebrate with a toast!!
Size: 4.25" x 5.5"
Springy card reminding me of sitting on
a porch enjoying the flowers and some red.
Close up of the bottle and glasses.
The simple sentiment says it all..
I would consider this an all occasion card.. You can celebrate just about anything: Anniversary, birthday, retirement, or just the joy of life.

So this is how I created it:
  1. Cut and scored a piece white CS to size A2
  2. Colored stamp with distress marks. Colors inspired by the photo.
  3. LIGHTLY sprayed the stamp to reactivate the ink and stamped on watercolor paper.
  4. Without re-inking I stamped the same image to the left and right of the original.
  5. Watercolored and then sponged Distress Ink around the perimeter and some washed black throughout the panel
  6. Mounted the panel to black CS leaving a border.
  7. Added the entire design to my white CS base.
Well that was it.. I hope you enjoyed the card.. Let me know by leaving a comment.. I love reading them. Have a great night or good morning (wherever you are in the world.) and thank you so much for stopping by.. 

All the best,
Shawna 

Thursday, May 14, 2015

Genie in a Bottle

Hello All,

First off, I would like to thank everyone for your wonderful comments on my blog.. They really mean a lot to me and wanted to let you know it is appreciated..

So, for today I am submitting a birthday card with three wishes and sending it out to these challenges..


Entering Challenges:
Happy Little Stampers Sketch Challenge: May 2015
The Paper Players Color Challenge #244- PP244
House of Cards- Bokeh Effect

Boy, this card packs a punch!! So much inspiration!! Seriously I was on overload and then 'DING' there was my design; now I just have to put it to paper.. Well here it is I really hope you like it..

Bokeh effect seems to work well with the genie in a bottle theme.
The 'wishes' sentiment is also very fitting
Just a band of bling and a
sprinkling around the circle adds a touch of pzazz. 
Today I actually saw the sun!!
Taking advantage of the light to let the gems sparkle.
Boy, this card packs a punch!! But look at all I had to pull from! All these challenges put me in overdrive; my mind turning but then I found out it was my son's teacher's birthday! She loves sparkle and thought this card would be absolutely perfect for her. So off I went!!

And this is how I did it!

  1. Cut and scored my CS to 4.25" x 5.25"
  2. Masked off the area I would leave white
  3. Stamped dots and heat embossed with clear powder
  4. Sponged Pistachio Pudding over the CS; emboss resist
  5. Ironed off the embossing powder leaving the white circles.
  6. Using Lost Lagoon, Frosted White pigment ink and something like Sahara Sand but did have something close.) I stamped even more circles till I got the desired effect
  7. Sponged Lost Lagoon around the edges followed by Frosted White. 
  8. Stamped 'Happy Birthday' sentiment using Nautical Blue.
  9. Stamped 'wishes' three times.
  10. Added rhinestone border and then added them around the card.
  11. Glued the 'genie bottle' to the card.


That was it!! It seems like a lot of steps but really it went by very fast!! With the ink drying I gave the card to my son's teacher.  She LOVED it!! And the gift certificate inside helped too. 

Well I am going to post another card later tonight. So you aren't done with me yet! Anyway, thank you so much for stopping by and don't forget to leave comments good, great, or otherwise.. Take care and see you soon!

All the Best,
Shawna
Related Posts Plugin for WordPress, Blogger...

Labels

(PIN)spirational (76) 4 Crafty Chicks (1) A Day For Daisies (3) AAA Birthday (5) AAA Cards (49) ABC Christmas Challenge (1) Addicted to CAS (41) Addicted to Stamps (2) Addicted to Stamps and More (31) All Dressed Up Challenge (1) Allsorts Challenge (4) Alphabet Challenge (2) Always Playing with Paper (11) Animal Friends Challenge (3) As You See It (11) Brown Sugar Challenge (12) CanYouCaseIt Challenge (1) Cards in Envy (21) Cardz4Galz (2) Cardz4Guys (12) CAS Colours & Sketches (26) CAS Mix Up (1) CAS on Fridays (7) CAS on Sunday (5) CAS Stencil Challenge (1) CAS Watercolour Card Challenge (12) CAS-ology (54) CAS-ual Fridays (4) CAS(E) this Sketch (90) CASEing Christmas (1) casology (1) Challenge Up Your Life (6) Christmas Card Challenge Blog (2) Christmas Card Throwdown (1) City Crafter Challenge Blog (37) Color Hues (8) Color INKspiration (2) Color My Heart Color Dare (41) Colour Q (26) Come and Get It Challenge (3) Craft Stamper Challenge (2) Crafty Cardmakers (2) Crafty Creations (1) Crafty Gals Corner (10) Crafty Hazelnut's Christmas Challenge (1) Create with Connie and Mary (8) Creative Inspirations (2) Creative Knockouts (5) Creative with Stamps (46) Cupcake Inspirations (28) Curtain Call (18) Daisy Chain Challenges (2) Daring Cardmakers (2) Day of the Month Card Club (4) Design Team (294) Double D Challenges (42) DRS Designs (4) Fab Friday (5) Fab n' Funky (2) Fantasy Stampers (1) Festive Friday (2) Freshly Made Sketches (125) Friday MashUp! (3) Fusion (33) Gina K. Designs (1) Global Design Project (2) Guest Designer (42) Hand Stamped Sentiments (18) Happy Little Stamper- Anything Goes with Dies (1) Happy Little Stamper- CAS (3) Happy Little Stamper- Christmas (4) Happy Little Stamper- Mixed Media (1) Happy Little Stamper- Sketch (1) HLS Christmas Challenge (1) Holly Jolly Christmas (1) House of Cards (49) If You Give a Crafter a Cookie (6) IN(K)SPIRE_me (5) Inkspirational (50) Inspire.Create.Challenge (1) Inspired by All The Little Things (10) Inspired By... (11) Jingle Bells (1) Joy of Sets Tic-Tac-Toe Challenge (1) Just Add Ink (14) Just Us Girls (58) Less is More (23) Let's Squash It! (1) Little Tangles Challenge (4) Make It Monday (2) Make My Monday (61) MarkerPOP! (1) Match this Sketch (1) Merry Monday Challenge Blog (2) MHK Designs (114) Miscellaneous (3) Mix It Up (1) Mod Squad Challenge (12) MoJo Monday (1) My Time to Craft! (6) Naughty or Nice Challenge (3) NBUS (7) One Layer Christmas Card Challenge (2) Paper Craft Crew Challenges (7) Paper Pals Arts (2) Papercraft Challenge (4) Pattie's Creations Design (3) Pause Dream Enjoy Challenges (1) PolkaDoodles Challenge (1) Rainbow Card Challenge (6) Retro Rubber Challenge (21) Retro Sketches (4) Rubber Dance Blog (1) Runway Inspired Challenge (2) Seize the Birthday (9) Sentimental Sundays (1) SheepSki Designs (1) shopping (1) Shopping Our Stash (15) Simon Says Stamp Monday Challenge (5) Simon Says Stamp Wednesday Challenge (6) Simon Says Stamp Work it Wednesday Challenge (1) Sister Act (1) Sketch Saturday (13) Society of Stampholics (3) Sparkle and Shine (3) SSS Wednesday (10) Stampin' Royalty (2) Stamping Sensations (7) StampInkPaper (5) STAMPlorations-Theme & Sketch (3) StampPeddler (26) Sunday Stamps (48) Sweet Stampin (4) Technique Tuesday (1) TGIF Challenges (3) The Card Concept (36) The Challenge (4) The Color Throwdown (119) The Crafty Addicts (1) The Flower Challenge (15) The House That Stamps Built (1) The Library Challenge (4) The Male Room (89) The Merry Christmas Challenge (2) The Paper Craft Crew (1) The Paper Players (120) The Sisterhood of Crafters (2) Tic Tac Toe Challenge (4) Time Out Challenge (25) Try Stamping on Tuesday (2) Tuesday Morning Sketches (1) Tuesday Throwdown (11) tutorial (1) Twofer Challenge (14) Virginia's View Challenge (5) Waffle Flower (1) Watercooler Wednesday Challenge (12) Wednesdays Creative Inspirations (4) Weekly Christmas Challenge (1) Your Next Step (1)